This is a simple DYI project aimed at soldering beginners (like myself :P). For more experienced tinkerers it should seem like really simple and short, but I hope it will help some of you avoid spending money on a new extension cable (and pollute the environment in the process).
DO NOT follow the tutorial below if you don’t know how to solder or how the electrical system works. Even if you decide do go ahead, please be careful – you are doing it on your own risk. I cannot be held responsible for any accidents occurring while following this tutorial. If at any time during or after the change you feel a burned smell from the power cord, just unplug it and go buy a new one!
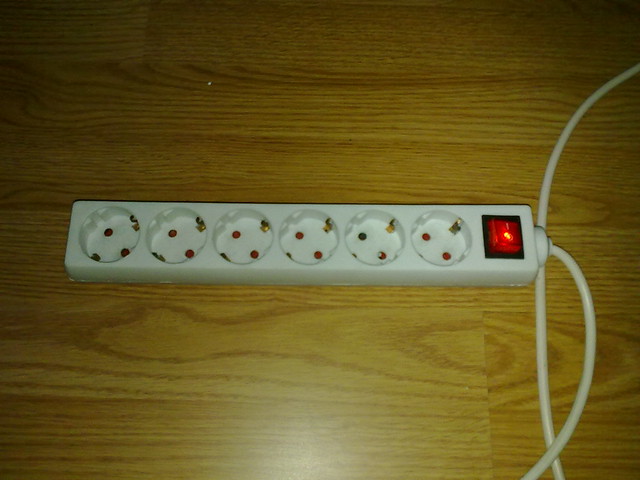
So, we have a classic, cheap extension cord with a power indicator in a translucent case. When the extension cable is under tension, the light is lit. Unfortunately, the button was damaged and the light was always on, consuming electrical energy for nothing and generally being useless. I was hoping to remove the light but keep the switch, but that proved impossible.
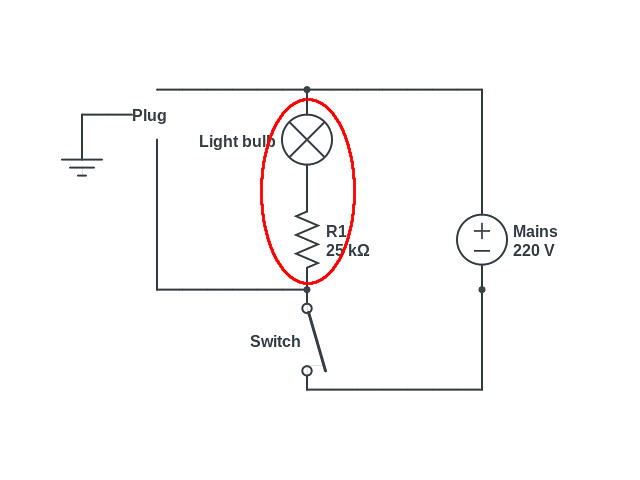
Below you have the schematic of the circuit of the power strip. As you can see, this is a very simple circuit. The part in red is what I was trying to remove, but unfortunately the switch had to go too, because it was too badly damaged.
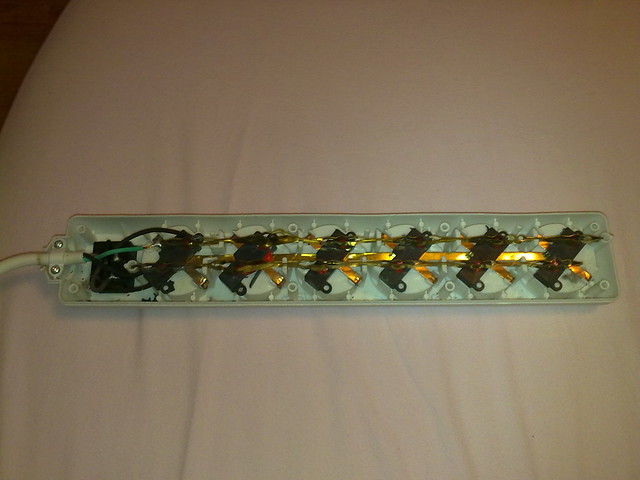
The first step is to remove the back panel. It is usually screwed with 6 or 8 screws, depending on the size and the quality (read: price) of the power strip. After removing it, we can see this strip is in pretty bad shape: the metallic strips are al over the place and some of the kid-guarding plastics are broken.
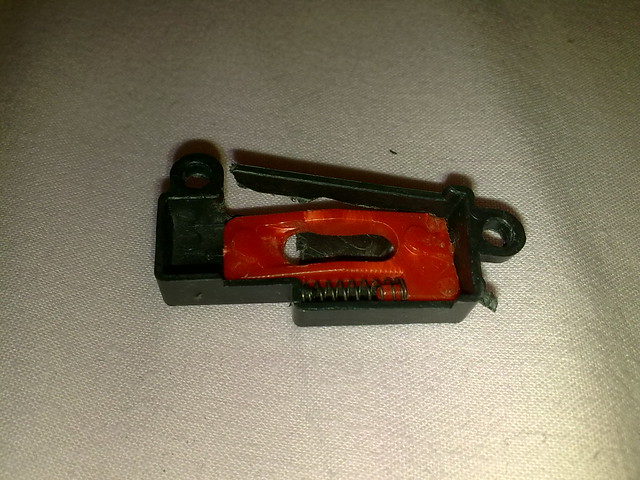
The image above shows how the kid guard works: the red plastic covers the holes. When the plug is inserted, the spring is compressed and the plastic bit gets out of the way. Unfortunately, in cheap power plugs, this doesn’t work as intended. In order to introduce the plugs, you have to use a considerable amount of force, eventually breaking the fragile plastics around there. If you have such problems, you can just remove the red plastic and the springs, leaving the holes uncovered.
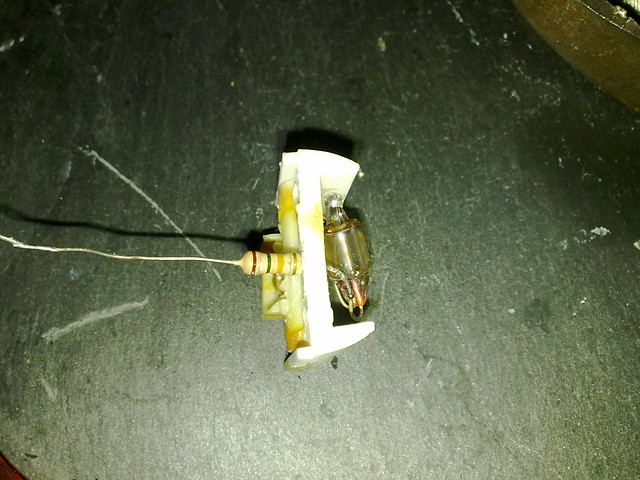
Also, before we go on to actually unsoldering anything, I want to show you the light encasing opened. Notice how the translucent switch has melted or was somehow broken, thus rendering it useless. You can also see the 25KΩ resistor linked to the neon light. In other power strips, you could have an LED instead of the neon. This resistor could be reused if you have some other project requiring such a large resitor, but I’m not sure if the light still works.

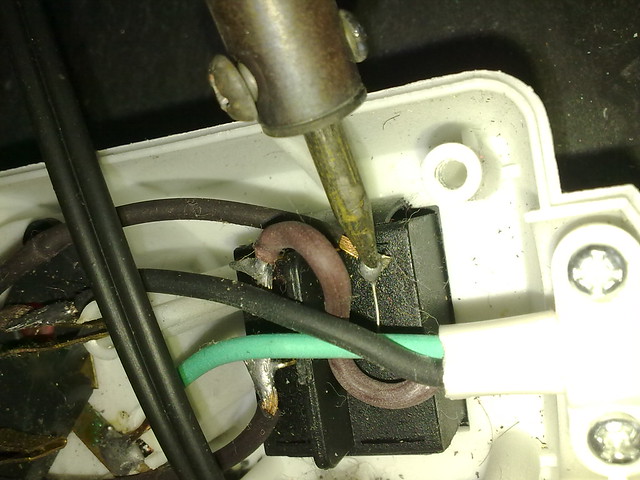
But let’s get back to the problem at hand. Looking closer at the light, one can see that the connectors are soldered to the light case. In more expensive power strips, the cables could be attached otherwise, making your job easier.
Another important step is to determine which wire is which. In domestic AC power, there are normally 3 wires: live (phase), neutral and ground. If the system is unpolarised, like this so-called „Schuko” (aka CEE 7/4) system, the the live and neutral wire are interchangeable, which means we only have to identify the ground wire. Normally, the wires are color-coded and the ground is yellow-green, but not in this power strip.
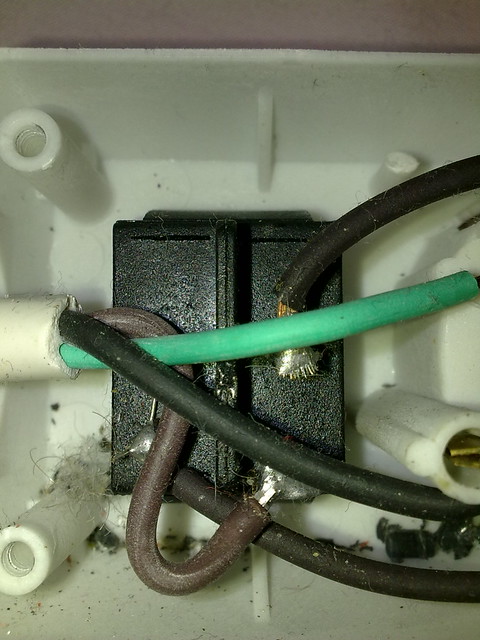
In the image below, you can see the green wire is connected to the metal strip from the center of the plug, which means that this is the ground wire. One of the other wires is directly connected to the metal strip, so we only need to unsolder and reconnect the remaining wire.
Here is how the power strips looks after unsoldering all the wires and removing the light case. You can also take a better look at how the wires are connected. One can easily notice that the top black wire is now superfluous, as that particular metal strip is already directly connected to the power cord.
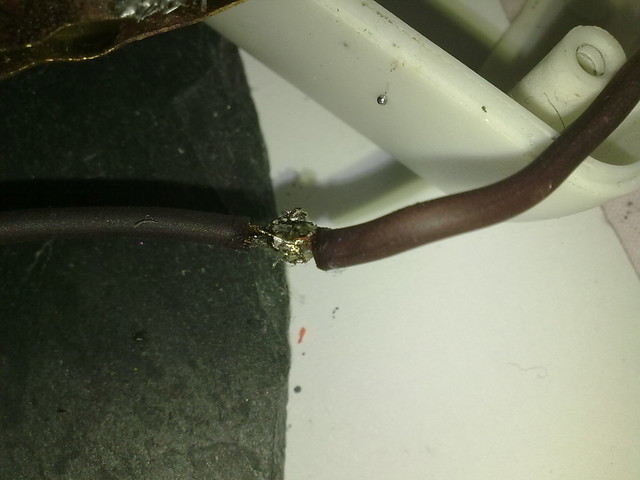
The soldering itself should be fairly quick and does not require special tools or skills.
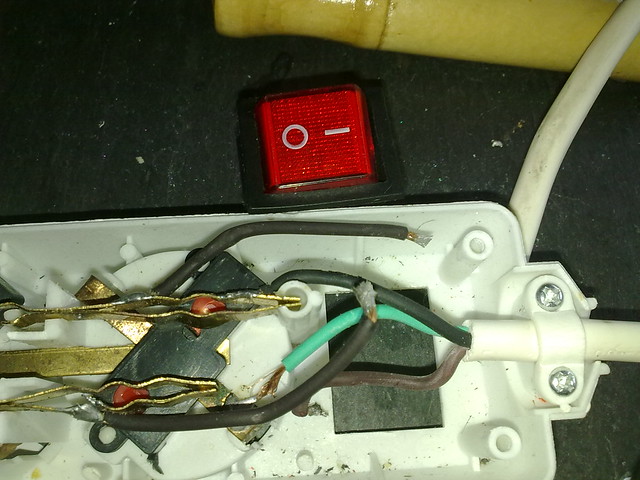
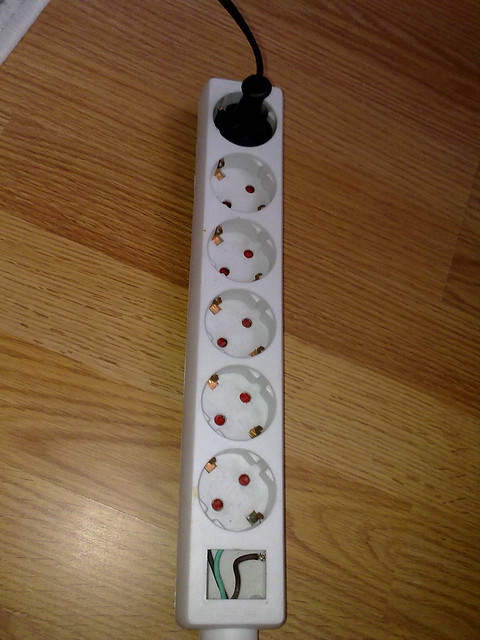
That’s it, we are ready for a test! The wires are visible through the hole left by the light casing. This is not really nice, so we can just remount the case, which is hold in place by two clips. Of course, the button is now only decorative.
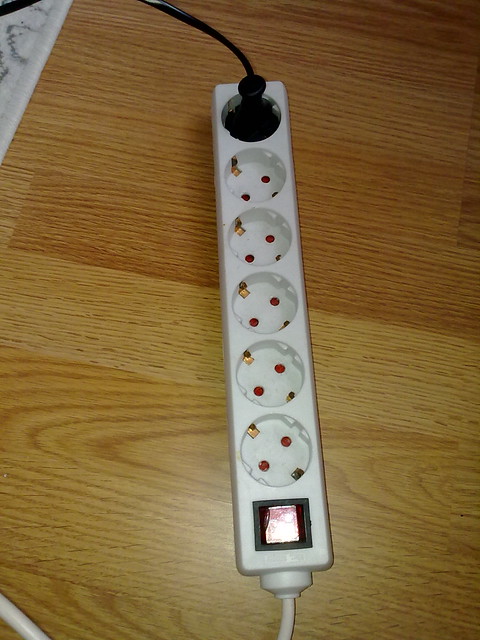
If you look closely, you will notice one of the corners of the button is melted. It wasn’t like this at the beginning, but I accidentally touched it to the soldering iron. You should always be careful when using soldering tools, as they do get very very hot.

Lasă un răspuns